Navigation [hide]

Roofing 101: Pitch Finding

The pitch of a roof is one of the most important considerations in your project. Why is determining roof pitch so vital? Well, it’s a huge factor in all of your linear measurements.

Eyeballing roof pitch is risky. When pitch is miscalculated, it can cost you in supply overages, shortages, and even your labor rates! When your crews are actually on the roof, the pitch can be the difference between a quick and easy tear-off and a scaffolding and steep-charges nightmare.

The roof you see here is a 16/12.

For the vast majority of residential roofs, the pitch won’t exceed 9/12, usually falling somewhere between there and 4/12. 

Determining Roof Pitch

The roof’s pitch is the angle of the roof, usually presented as the inches of vertical “rise” over 12 inches of horizontal “run.” 

What pitch of a roof is considered walkable? Generally anything above a 7/12 is considered a non-walkable roof and requires some extra equipment and usually some extra cost to the customer.

To calculate this, you need to measure how many inches a roof rises vertically for every 12 inches of horizontal length. You can then calculate the roof pitch using a calculator to make fast work of your roof measurements or manually in a ratio or degrees. 

There are also mobile apps and tools that can simplify the process even further and will remove the need to do any math—we’ll dive into those a bit later. 

Try our Roof Pitch Calculator

Finding Roof Pitch With Physical & Digital Tools

If you want to go the manual route for pitch finding, a level is a great tool to use. With its short form-factor and digital display, this is the kind of non-app tool that we can really get behind. As long as you don’t leave this in the truck or back at the office, it’s about as quick of a measuring solution as any. 

How to Use a Level to Find Roof Pitch

You’ll need a level that is 12” or longer and a tape measure to measure the roof’s rise for a 12” run.  

Once on the roof, hold the level steady against the roof. Measure the height from the roof to the level 12 inches away from where it meets the surface. This measurement will be your rise.  

Your roof pitch is the ratio of rise over run. So, if your roof rises 4 inches over a run of 12 inches, then it has a roof pitch of 4:12. 

For instructions on how to convert this ratio to degree (or to have our calculator do it for you!), visit our roof pitch calculator resource.  

The only downside with a physical measuring solution, like a trusty level, is that it isn’t the only tool you’ll need to determine your pitch. If you don’t have your ladder with you as well, you and your level are stuck on the ground.  

How to Use Mobile Apps to Find Roof Pitch

A quick caveat, we here at RoofSnap love using technology to make our lives and your job easier and more efficient. That being said, when you introduce new technology to your workflow, it's important to test it thoroughly to be sure you know the best practices and don't introduce inaccuracies.


IMG_8176
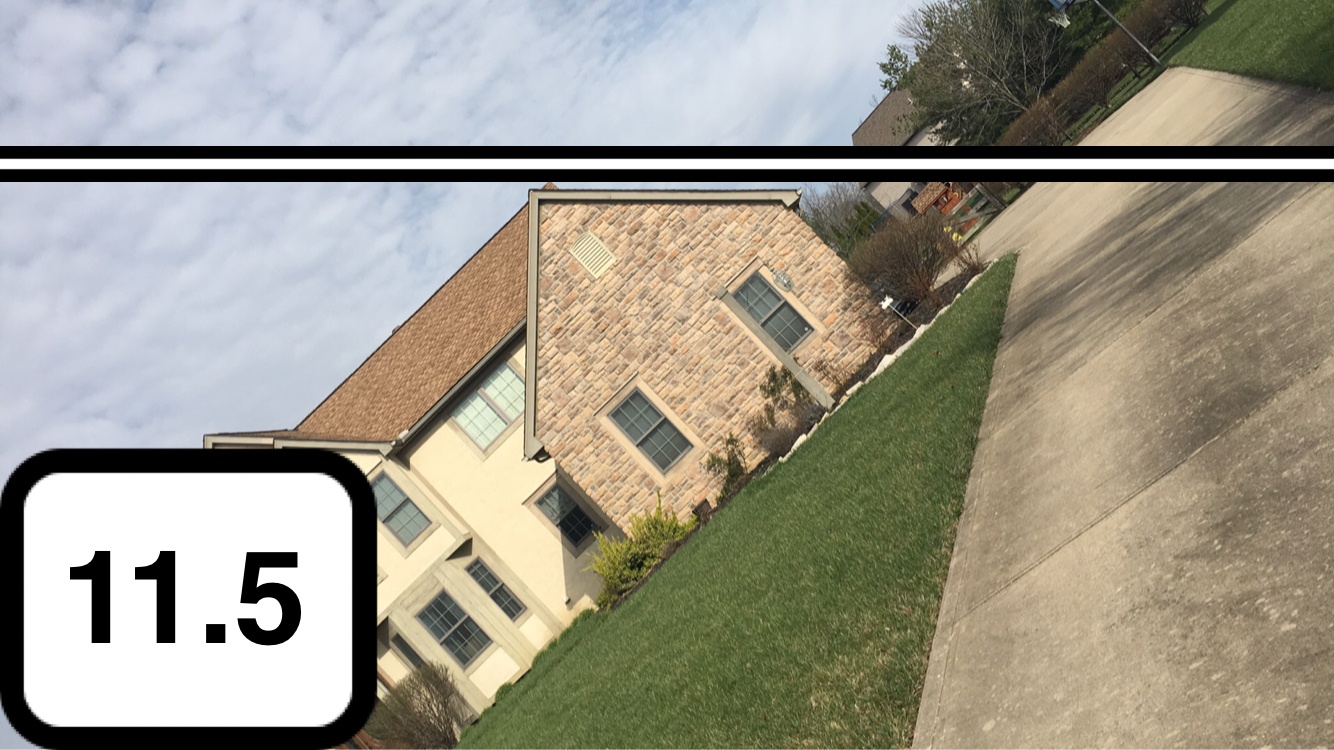
With most camera-based pitch gauges, you’ll want to stand directly in front of the rake
and far back for accuracy.


One of the quickest and easiest ways to determine pitch now is through one of the many apps available in the Google Play and iOS App stores. Many of these now use your device’s camera to gauge the pitch, and can be very accurate. User error is always a possibility though; make sure that you follow your app’s instructions on usage to insure your measurements are accurate. (We’ve written a post on using pitch finding apps to help.) 

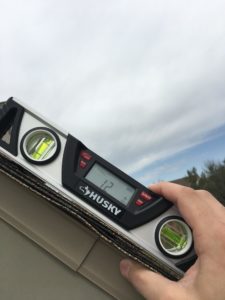
If you do have your ladder, but not your level, an app that utilizes your device’s internal gyroscope to determine pitch can be a lifesaver. Just make sure that both your phone and the app are calibrated correctly, and maybe try it out on some roofs you’ve determined pitch on previously before you trust it fully.


We’d also like to highlight our in-app pitch-finding solutions. On your iOS device, you can use either Street View or Flyover imagery in conjunction with RoofSnap’s 3D pitch card to determine pitch before you get on site. When the imagery is available, this is a great way to come prepared for your appointment, with an estimate already in hand. And you can reach out to the RoofSnap team to learn more about best practices for finding pitch on other platforms. 

With RoofSnap, you can use our DIY measurement tools to draw your own roof measurements. We also have a measurement ordering service, where all you need to do is provide an address. RoofSnap will take it from there and will prepare you a customized measurement report that includes the roof pitch.

Unfamiliar with the RoofSnap pitch card? Click here to see it in action!


Confirming Your Roof Measurements

If you take away anything from this blog, it should be that pitch is nothing to overlook when it comes to your project. Whatever method you use to determine the angle of your roof, make sure it’s tried and true. We’d like to push a new adage into the lexicon: “Measure twice, cut your cut-waste by two!” And whatever you do, don’t let your new guy try and use the “two-handed level and tape” method.

Determining the pitch prior to creating the project estimate is absolutely pivotal. If you’re an existing RoofSnap software subscriber, or have ever ordered a roof measurement report from us, you’ll know that while we offer different tools for determining pitch from aerial imagery, we always suggest confirming pitch on-site during your inspection.  

We hope this article helps you on your roofing journey.


Get More Accurate Measurements & Estimates with RoofSnap